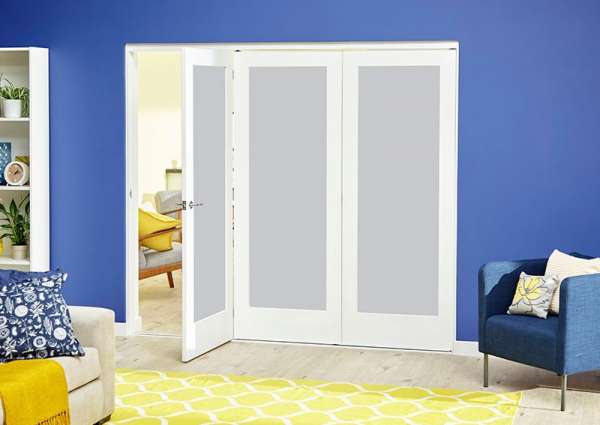
But a bifold door is a complex machine, and it requires a little bit of planning and expertise to get it into position and working properly. In this guide, we'll take you through the process of how to fit a new set of bifold doors – including how to remove the ones you've already got.
Can I Install Bifold Doors Myself?
If you're looking to save money on the cost of interior bifold doors, then the idea of fitting your bifold doors yourself might be attractive. You don't need any special expertise or qualifications to do the job, just the right tools, a little bit of patience, and the help of a willing volunteer (bi-fold doors are pretty heavy).
Are Bi-fold Doors Easy to Install?
Fitting a bifold door is a relatively easy job and doesn't require the skill of a professional labourer. It takes a couple of hours to fit bifold doors and there's no reason you can't do it yourself, although a helping hand is preferable. If you choose to fit the doors yourself there's also the added convenience of saving money.
The difficulty of the operation will depend on exactly what you're doing. While getting a new bifold door into an existing frame might be quite straightforward, getting an entirely new frame installed might not be. We advise you to read about the process before deciding whether you want to take on the task yourself or not.
If you're looking for an easy life, you might be tempted to bring in professional help to get your bifold door installed. Provided that you bring in a reputable and experienced tradesperson, you'll be able to minimise the likelihood of installation errors (which can be costly to correct). Moreover, you won't have to learn any new skills, or spend any time worrying about whether you've taken this or that measurement correctly.
How Long Does it Take to Install Bifold Doors?
It will usually take around 4 hours to fit an internal bifold door, though the exact time will depend on a lot of factors. The size of the door and the material it is made from will both affect the weight of the door and, in general, it will take longer to install the heavier it is.
It will also obviously take longer if you have to remove a set of existing internal bi-fold doors, and if you do the job alone. If you get a professional in to fit your doors they will usually be able to do it quicker than you will alone.
How to Remove Internal Bifold Doors
In many cases, you'll need to get an existing set of bifold doors out of the way before you can think about installing new ones. In the case of internal bifold doors, you're at a slight advantage, as you'll be able to get rid of the door without leaving any gaps in the outer wall of the property. This means you can remove the door one day and install a new one the next.
Even if you're going to be tossing your old bi-fold doors straight into a skip, it's worth learning how to take them apart without damaging them. It might be necessary to take the doors down again to maintain and refinish them, or to adjust the fixing to eliminate alignment problems as the door ages.
First, open the entire door so that you can hold all of the panels together. If you've got more than three panels in the door, you might wish to get someone else to hold them in place while you work on their removal.
Removing a set of bi-fold doors requires lifting the door up out of its bracket. Do this and pull out the bottom pin attaching the door to the frame. Then lower the door at a slight angle so that the pin doesn't fall back into the socket. The pin at the top, which attaches to the rail, should then naturally fall away.
At this point, your bifold door will be free, and you can carefully move it wherever you need it.
Do Internal Bifold Doors Need a Track?
All interior bifold doors need a track to open along - this is what makes them a bifold door. Opening along a track is what gives internal bi-fold doors the smooth, comfortable motion that makes them so popular.
With an internal bi-fold door you can choose between having your doors top-hung or top and bottom hung. With a top-hung bifold door, you only have a top track, not a bottom one. Many people prefer to have their internal bifolds top-hung, as the bottom track can cause a trip hazard.
Another benefit of top-hung doors is that you won't have to fit a track to your floor, which could damage tiles, laminate or wooden floors.
Can a Bifold Door be Hung on Hinges?
Though internal bifold doors will always have hinges (holding the panels together) they need a track to operate, as we've mentioned above.
If you would like an internal door that folds but is also hung on hinges, then a set of French folding doors would be a better option. These internal doors are designed to be hung using a hinge and can fold away flat against your wall when they are open.
How to Hang Internal Bifold Doors

Now that we've cleared a space, we're ready to hang the doors themselves. Given the complexity of a bifold door, this might appear slightly confusing at first. To simplify the process, you should assemble the required tools and lay them out before you begin. You don't want to have to whizz down to your local DIY shop midway through the installation.
You'll need all of the parts listed on the contents pack that came with the door. These typically include screws, tracks, pivots and hinges. You'll also need:
- A mallet
- A cross-head screwdriver
- A drill with both 2mm and 5mm heads
- A measuring tape
- A pencil
Step 1
First, we'll need to measure where our top track is going to go. This should be around 19mm from the front of the door frame. Mark this at various points with a pencil. The position of the track will determine the direction in which the door folds, so make sure you've worked this out before you make any permanent changes. Place the guide rail in the gap and mark with a pencil where the holes are.
Step 2
Create pilot holes where you've just marked using the pencil. You should then use the 15mm screws that came with your door to secure the track to the top of the frame.
Step 3
Now it's time to measure for your pivot bracket, which can either be installed into the floor itself or into the door frame. In the latter case, your bracket is a metal L-shaped device that should be installed exactly 1980mm beneath the top of the door, and 19mm from the front. For precision, you might want to get hold of a plumb bob level that'll show you exactly where 1980mm straight down from the top is.
Step 4
You're now going to slot the pivots into the pre-drilled holes at the top of the door. Do this loosely at first to ensure that they fit, before using a mallet to permanently fix them into position.
Step 5
The top metal track may contain several carriages, one of which is secured into position by a small screw. Loosen this and you'll be able to move the carriage along the track. This carriage is designed to remain in the top corner of the door, in line with the pivot bracket at the bottom.
Insert the relevant pins into the carriages, so that the entire door is able to freely slide backwards and forwards. Note that some smaller folding doors might make use of plastic rollers rather than proper sliding carriages.
Step 6
Insert the bottom pivot into the bracket you've installed. You can then screw the top carriage into position, manoeuvring the panel out of the way in order to access the screw. Once the door is assembled, you'll be able to reposition it by either adjusting this screw, or with the help of the pivot bracket at the bottom of the door.
Bifold Door Installation Tips: Dealing with Different Flooring Types

Bifold doors can be easily installed onto a range of different floor types. Each presents its own unique challenges, however, which are worth bearing in mind.
Installing Internal Bifold Doors On Carpet
A thick carpet might inhibit your door's ability to open and close. If there isn't enough clearance around the bottom for the door to hover above the fibres, you'll have problems further down the line.
Installing Internal Bifold Doors On Laminate and Tiled flooring
If you're installing a floor-mounted track, then you may need to drill holes into your laminate flooring. You can minimise the damage this causes by covering the floor in masking tape and using two holes: one of which will go all the way into the subfloor.
Alternatively, you might find yourself an L-shaped bracket that secures to the frame of the door rather than the floor. This is a solution that also saves you the trouble of drilling into a tiled floor.


